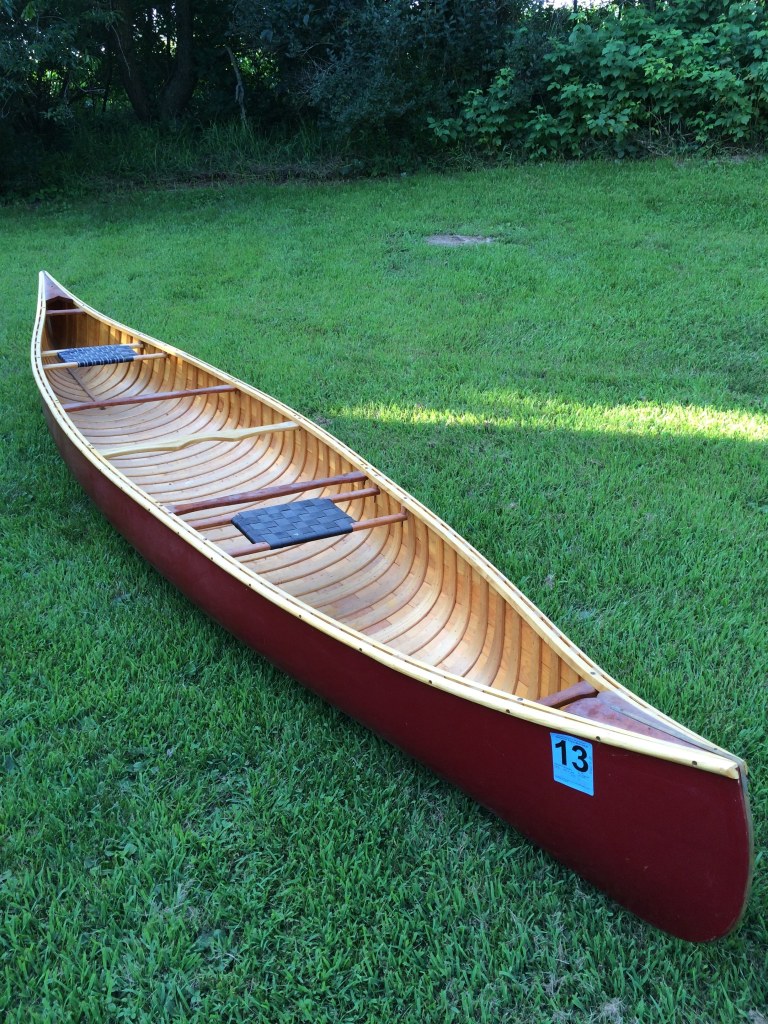
There’s something timeless about a cedar canvas canoe. It’s not just a vessel—it’s a tribute to craftsmanship, heritage, and the quiet beauty of natural materials. Building one is a journey that blends woodworking, artistry, and patience. Whether you’re a seasoned woodworker or an beginner, this guide walks you through the process of creating your own cedar canvas canoe. Launching from Owatonna, MN to points across the northland.
Several years ago I embarked on the journey of building my own cedar canvas canoe. What follows is a brief synopsis of the process of building a cedar canvas canoe. The focus was on the journey, not the destination.
Why Choose Cedar and Canvas?
Cedar canvas canoes have been cherished for over a century. Here’s why they remain popular:
- Lightweight & Durable: Cedar is naturally rot-resistant and lightweight, making it ideal for watercraft.
- Flexibility: The canvas skin allows the canoe to flex slightly, absorbing impacts better than rigid hulls.
- Repairable: Damage to the canvas or wood can be patched or replaced without compromising the entire structure.
- Aesthetic Appeal: The warm tones of cedar and the classic lines of the canoe make it a visual masterpiece.
Materials & Tools You’ll Need
Materials:
- White Cedar planks – I sourced my white cedar from a supplier in Superior, Wisconsin.
- Ash for gunwales and ribs – Sourced from Vetsch Hardwoods in Rochester, MN
- Canvas (No. 10 duck canvas is common) – Purchased from Stewart River Boatworks in Knife River, MN https://stewartriver.com/
- Marine-grade epoxy or varnish – I used West Systems two part epoxy and Minwax spar varnish
- Bronze – Sourced from Northwoods canoe in Maine. https://www.wooden-canoes.com/
- Wood glue
- Paint or filler for canvas sealing – Also sourced from Stewart River Boatworks.
Tools:
- Steam box (for bending ribs)
- Clamps
- Hand saws and block planes
- Spokeshave
- Drill and bits
- Sandpaper
- Staple gun or tacks
- Brushes and rollers
- Canvasing Pliers – a wide jaw vise grips for pulling the canvas tight over the finished planking.
- Bandsaw, for resawing cedar into planks and ribs
Step-by-Step: Building the Canoe
1. Design & Planning
Choose a canoe design that suits your needs—solo paddling, tandem, or cargo. I purchased a plan set for the Stewart River Pal from Stewart River Boatworks. The plan is based on the Chestnut Pal. From Stewart River regarding the Pal, “The beauty of this boat is that it fits the sportsman’s need for a stable canoe, yet has good paddling characteristics. It’s perfect for a family canoe trip or an evening paddle”.
2. Build the Mold
Construct a strongback and mold stations based on your chosen design. These forms shape the hull and guide the planking. One of the challenges of building a cedar canvas canoe is building the mold. Because the mold is full size, it takes up as much room as the canoe itself, so finding a place to store it can be challenging.
A canoe mold, weather for a cedar canvas or cedar strip boat is a series of station molds. Simply put, a station mold is a representation of the final canoe shape at stations (predetermined distances) along the length of the canoe. The station molds are attached to the strongback or base of the canoe. In the case of the cedar canvas canoe, the station molds are then covered with additional fairing strips to create a male mold. Sheet metal is also attached perpendicular to the fairing strips at the rib locations. This is done to “clinch” the brass tacks when the planks are attached to the ribs.
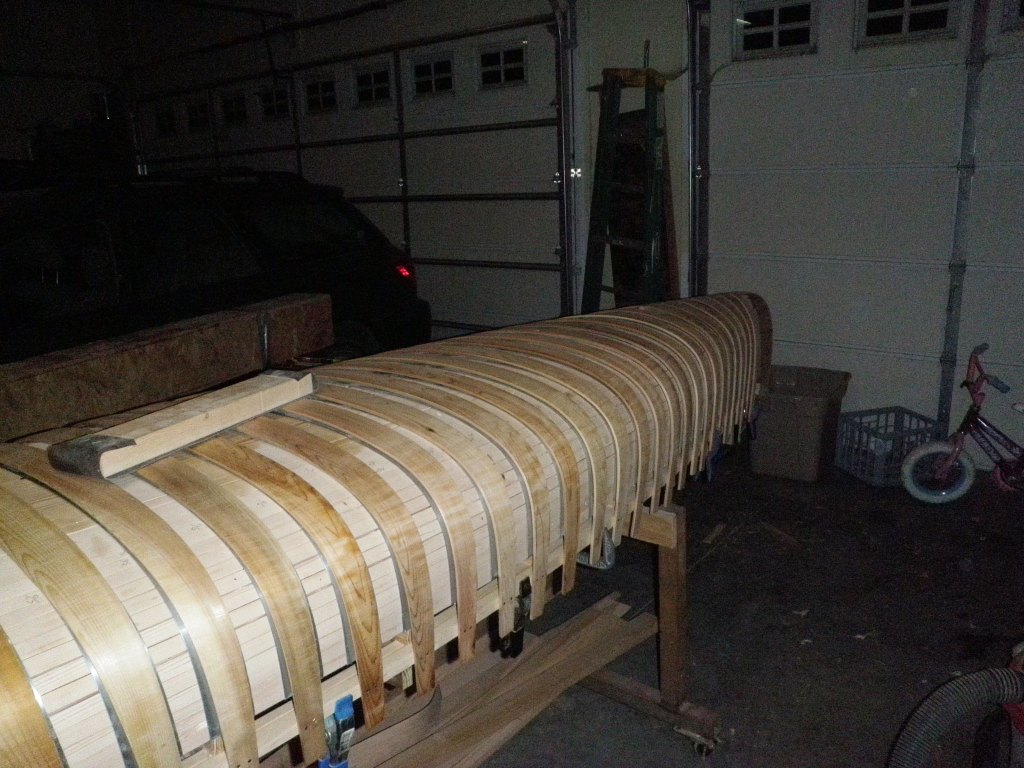
3. Steam & Install Ribs
- Soak and steam white cedar ribs until pliable.
- Bend them over the mold and clamp in place.
- Allow to dry and set before fastening.
4. Plank the Hull
- Attach cedar planks longitudinally along the ribs.
- Use tacks or staples to secure each plank.
- Plane and sand the hull smooth once planking is complete.
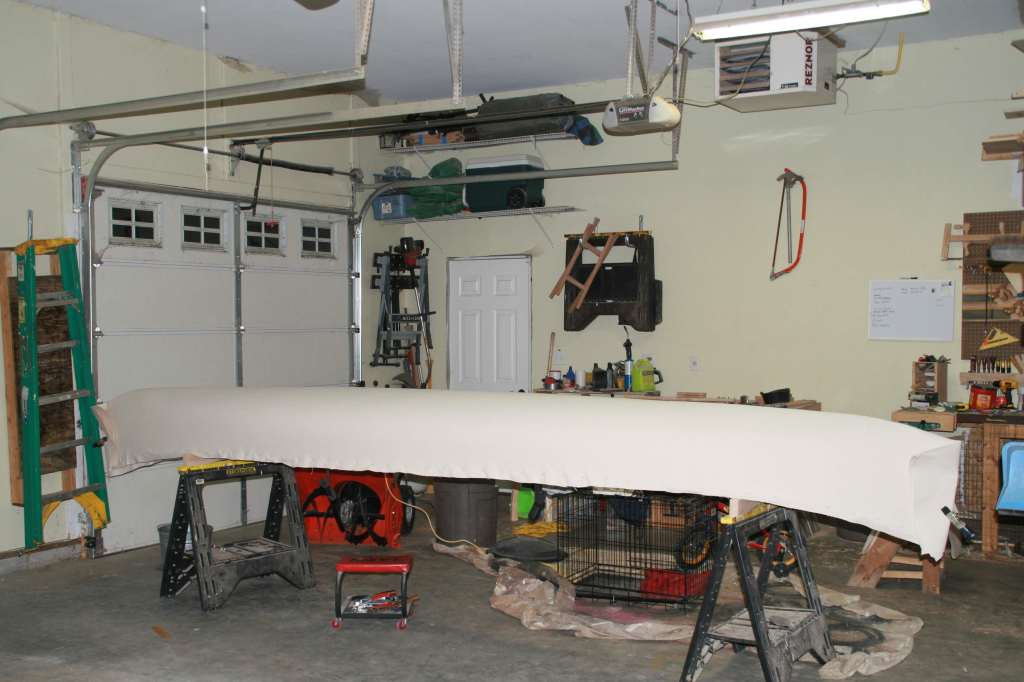
5. Apply the Canvas
- Stretch canvas tightly over the hull.
- Tack it along the gunwales.
- Use a filler compound to seal the canvas and create a smooth surface.
- Let it cure thoroughly.
6. Install Gunwales, Decks & Seats
- Attach inner and outer gunwales. I chose Ash for durability
- Add decks at the bow and stern. To add some flair, I used cherry wood for the decks.
- Install seats using dowels or cane webbing. My first attempt was to use cherry for the seats, while they looked great, they were not durable enough for the weight placed on them. They were replaced with ash seats.
7. Finish the Canoe
- Sand all surfaces.
- Apply marine varnish or epoxy to protect the wood.
- Paint the canvas hull with marine-grade paint.
Tips for Success
- Take your time: Rushing leads to mistakes. Enjoy the process.
- Practice steam bending: It’s an art—experiment with scrap wood first.
- Keep it dry: Moisture is the enemy during construction.
- Document your build: Photos and notes help if you build another.
The Reward
Launching your cedar canvas canoe is a moment of pride. It’s more than a boat—it’s a handcrafted heirloom, a floating piece of history, and a testament to your dedication. Whether gliding across a local lake in Owatonna or a misty on a BWCA lake, your canoe will carry stories for generations.
There are a lot of resources in print and online for constructing a cedar canvas canoe. Cedar strip canoes tend to be more common I believe due to less investment in the form.


Leave a reply to Rachel Bloom Cancel reply